American Farriers Journal
American Farriers Journal is the “hands-on” magazine for professional farriers, equine veterinarians and horse care product and service buyers.
Last issue we had a case history about the use of the Z-bar shoe (American Farriers Journal May/June 2004). Now, we’ll take a look at a couple of ways to make this shoe.
First we’ll look at making the shoe from one piece of bar stock, as was the shoe used on the horse in the case study. Then we’ll look at making the shoe from two pieces of stock, with the bar portion of the shoe jump welded in.
After making these shoes for this article, I prefer the one-piece method. It seemed to flow off the anvil easier. But I’d suggest building a couple shoes each way to see if you like one more than the other.
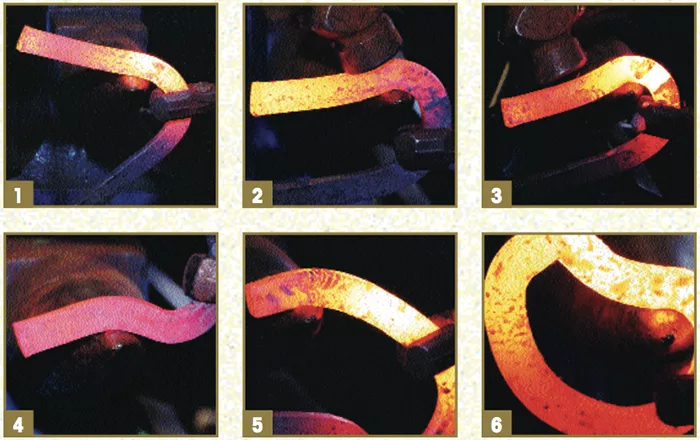
For the one-piece method, begin with a normal toe bend, then bend one branch toward the inside of the shoe sharply (Figures 1-3). Bend this piece in the opposite direction somewhere in the middle (Figure 4).
At this point, move to the heel region of the other branch and make a short hockey stick (Figure 5). Bring the ends of the shoe together (Figure 6) and line them up so that they overlap at 90 degrees to each other (Figure 7). Weld at this corner (Figure 8) and move to the tip of the horn to shape and forge the weld (Figure 9).
When nailing shoes on injured feet, I like to have multiple nailing options, as well as a crease to allow individual nail pulling. With…
American Farriers Journal is the “hands-on” magazine for professional farriers, equine veterinarians and horse care product and service buyers.

American Farriers Journal is the “hands-on” magazine for professional farriers, equine veterinarians and horse care product and service buyers.
Download these helpful knowledge building tools